Opening Lesson Planner:
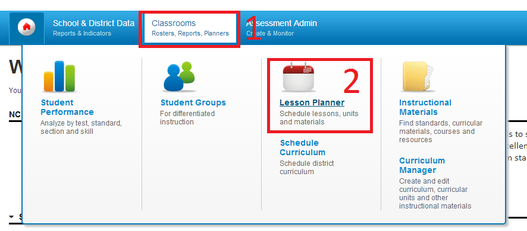
To open the lesson planner, you must be logged in to Schoolnet and accross the blue ribbon, hover on "Classrooms" and then click on "Lesson Planner."
What does Lesson Planner look like?
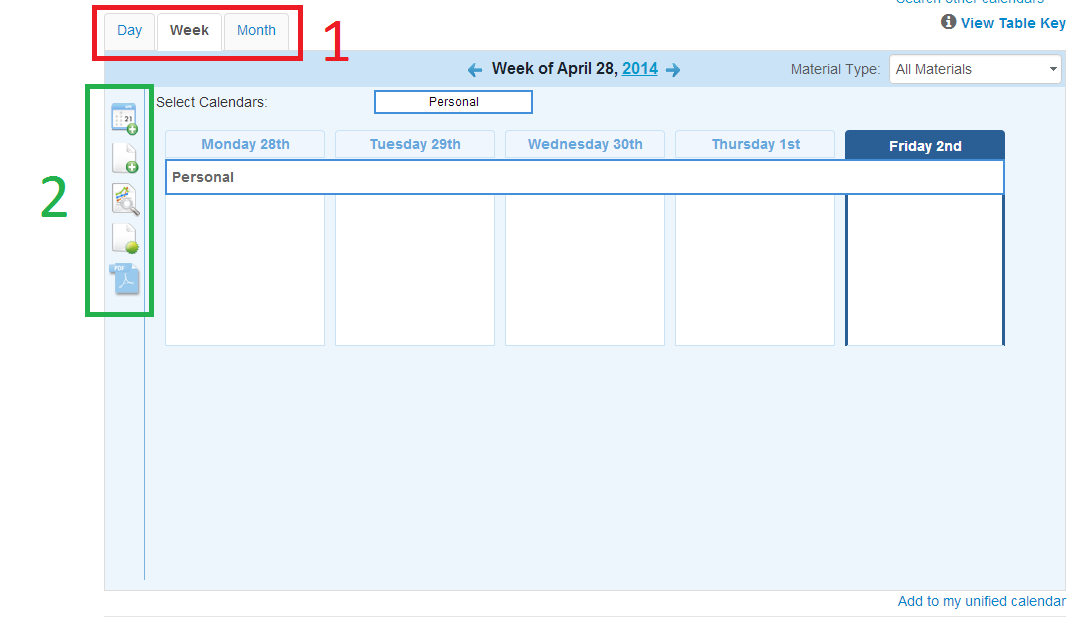
This is what your lesson planner looks like by default. In top left corner (outlined in red), you can change the view of your lesson planner to a day, week, or month view. Along the left side (outlined in green), are the main function buttons, which from top to bottom:
- Schedule materials
- Create materials
- Schedule standards coverage
- Create an event
- Create PDF of all materials in your lesson planner
Scheduling Materials:
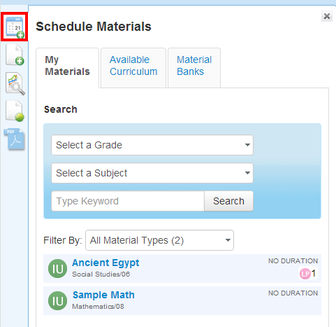
Clicking on the Schedule Materials button will allow you to schedule materials for all of your sections. You can choose from any materials you have created, materials made available to you from the district, or you can search the thousands of resource materials available in Schoolnet.
To add materials to your schedule, simply drag them from the results to the particular day you wish to teach them. Once the material is on your lesson planner, you can click the pencil icon to edit any details.
To add materials to your schedule, simply drag them from the results to the particular day you wish to teach them. Once the material is on your lesson planner, you can click the pencil icon to edit any details.
